Wednesday, April 24, 2013

Mauhúr

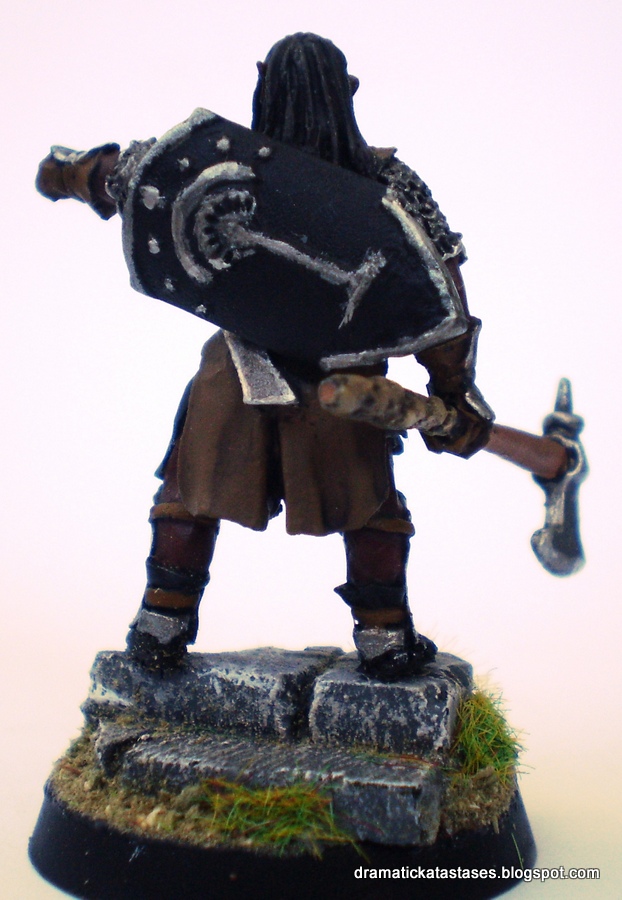
   Mauhúr is an Uruk-hai Captain, an instinctive, merciless and relentless hunter. His warband of Marauders are almost completely tireless, able to cover great distances at speed - once the prey is in their sights, there can be no escape. Mauhúr wears armour only across his torso, as well as armoured boots, and a short cloak. 
   The original model is very nice but is a finecast one. I have the blister of Shagrat and Gorbag, the kit where Shagrat holds the Mithril coat. I don't really like this Shagrat model version. I think it is very short for such a famous Hero! On the other hand, Shagrat War Leader model has the proper height according to my standards. So, the problem solved - I found my Mauhúr!

Mauhúr

   I changed the Mithril cloak with a war axe and I gave him a Numenor Warrior's shield. As a named Captain, he has to distinguish among his Marauders! His height doesn't help, so I placed him on some ruins! Mauhúr now is ready for raids!
  

   Below you can see a Marauder, my Mauhúr (ex-Shagrat) and Shagrat War Leader!


   And of course the "family photo" of all the Uruk-hai Captains! From left to right: Ugluk, Vrasku,  a no-named Captain and Mauhúr!


   That's it for today! Stay tuned for more!

Saturday, April 20, 2013

Gorbag, Orc Captain

   Gorbag is a named Captain of Mordor, the leader of the contingent of Orcs from Minas Morgul. He is a cunning and cruel individual. I wanted to give him a shield to increase his D value but instead of holding it I decided to make him step on it! On a Minas Tirith Warrior's shield, to be exact! In fact, he is so foxy that the opponents may think he doesn't have any shield, but actually he has one!

Gorbag


   I grabbed the opportunity to paint the eyes of my previous Orc Captains. No red eye dots anymore!  


   And of course the famous Shagrat:


   The old time classic "family photo". Only Grishnakh is missing!


   That's it for today! Stay tuned for more!
   Andrew Saunders welcome on board!

Friday, April 12, 2013

Dwellers in the Dark WIP (Part 2)

   The other day I bought two models of "Gulavhar, The Terror of Arnor" for a very - very nice price! Why? Because, I wanted to convert these miniatures to "Dwellers in the Dark" and add them to my previous two, so that I will have a colony of these evil creatures at the end!   

Dwellers in the Dark

   The main idea was to keep the bodies of Gulavhar models and replace only their heads with the remaining ones of the Dwellers. A couple of skeletons, the dead warrior of the Wild Warg Chieftain set and some rocks were used to decorate the bases!


   The first step, to stick the wings on the bodies, was the most time consuming part of the assembly! The wings are very heavy and only with the help of pins they stay on their places. The heads and the hands didn't bring any problem at all. Furthermore, I tried to avoid the twin effect by differentiating the height of the two models. The Gulavhar miniature stands on a rock, so I cut one of these rocks and reduced its height by half. 


   After many hours and a lot of green stuff the two Dwellers were ready:

Dweller in the Dark A


Too many bones!


Dweller in the Dark B


The "birthday cake" base!


   That's it for today! Stay tuned for more!
   Nathan Watt, welcome on board!

Sunday, March 31, 2013

Dwarves

   This is my first attempt to post a video, so please be merciful! 

   My Dwarf Army 

   Happy Easter to you all!
   Fin and DeadGuy welcome on board! 

Thursday, March 21, 2013

Dwellers in the Dark WIP

   In my opinion, Dweller in the Dark is one of the best GW LotR miniatures. It is a finely detailed resin cast kit that consists of 10 parts, with two different heads among them. Almost a year ago I ordered one kit like that. When I received it, I opened the box, took a look and left it aside.
   The day I decided to assemble it, I had a great surprise! The kit had three left hands (two of them identically the same) and no left leg! I send an e-mail to GW to ask what I had to do about it, though many months had passed since the moment I received the kit. What was the answer? They sent me a new one, free of charge and I didn't have to send back the initial one!!!
   After that, I had a dilemma! What to do with the defective Dweller in the Dark! To keep it or not. I confess that I didn't have the stomach for throwing it away. So, take a look what I did:

Dwellers in the Dark

The three left hands

The missing left leg (last on the right)

The "artificial" leg
 
   When I received the new Dweller figure I copied its left leg using balsa wood.

At the operating table

The left leg, as good as new!

   To avoid the twin effect I used different heads and different left hands for my Dwellers. Additionally, I set one Dweller on the original base, the one with the dead dwarf,  while the other Dweller on a base decorated with a broken and fallen Ziterdes statue. 


   The next step is to paint them.
   That's it for today! Stay tuned for more!   

Friday, March 15, 2013

Cirdan of the Havens

   Cirdan of the Havens is a very interesting Elf lord. I had the "Master Elrond" Mithril miniature holding a papyrus which in my opinion did not match with the Elrond character. That's why I painted his hair grey and "baptized" him Cirdan. There was a temptation to give him a beard but finally I left him barefaced as the original miniature was, like all the Elves! 

A top view

Cirdan 

Cirdan's cloak


   That's it for today! Stay tuned for more!
   By the way, y_salioelsol and The Hon, Lord Gordon welcome on board! 

Saturday, March 9, 2013

Wild River

   The other day we played the Fords of Isen battle and for the purposes of the scenario we needed a wild river. To make one, I followed the same steps as I did with all the previous terrain pieces.

The three parts of the river

Fords of Isen battle

   The tools I used were: a silicon pistol, a sculpting tool and a plastic spoon! The materials were: hard paper, wood putty, little rocks and static grass. First of all, I drew the banks and the shallow passages of the river on the three hard paper pieces. Each piece is 15x50cm.  


Black and grey wood putty and little rocks 

    After that I applied the wood putty on the papers and while it was still wet I stuck the rocks on it. At some point the grey putty finished and I continued with the black one. 


    When everything became dry I painted burnt umber the ground, green and blue the river, white the foam of the river flow and grey the rocks.


   Then the critical moment came! To make the waves of the river, the huge waves to be precise because the river is a wild one! For that reason, I used silicon, which I applied with a silicon pistol all over the river. When all the river surface was covered with silicon, I used the sculpting tool to make it even from bank to bank. And finally, I hit the applied silicon from one edge of the river to the other with the rear side of the spoon bowl. The last took several minutes but when I finished the waves were done! It is important to hold the spoon parallel to the river banks while you hit the silicon surface so that all the waves have the same flow direction. 
    
The tools and the first part of the river

The river under artificial lighting

   I had to wait all night for the silicon to became dry and after that I took some more photos at daylight this time:


   That's it for today! Stay tuned for more!
   By the way, a warm welcome to Cylde, Pablo Sanchez and Gareth the Grot!
Related Posts Plugin for WordPress, Blogger...