Showing posts with label Hints and Tips. Show all posts

Friday, December 14, 2012

Moria Display Box WIP (Part 3)

   Moria Display Box interior is ready. The only thing I have to do now is to buy a glass as a cover and that's it! The box has 91 slots to place my entire Moria army. Next time, when I finish a Moria unit, I will make a post with it inside the box.

The interior is ready

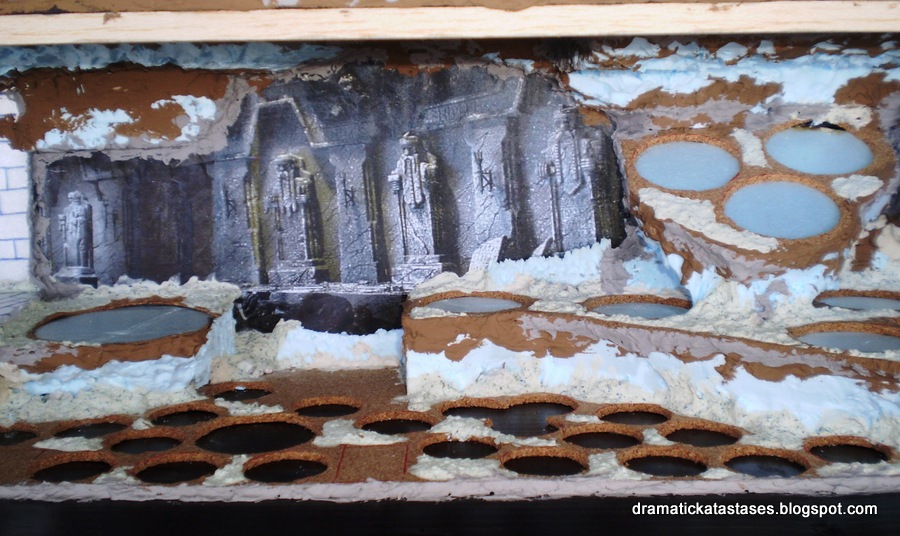
The interior as it was unpainted

The grey and brown stuff is wood putty while the white is plaster


The stone walls are ready 


The timber beams are ready

The statues are ready


   That's it for today! Stay tuned for more Moria!
  

Saturday, November 24, 2012

Moria Display Box WIP (Part 2)

   The interior of the display box is almost ready. I set every "rock", "cliff", etc in order, so that all evil creatures of my Moria army have their places. To tell you the truth, this was the hard job to  do. The materials, which I use, are the same with that of the dwarf box. They are real tiny stones, balsa wood, plaster for modeling and hobby, wood putty, DOW insulation foam, cork sheets and white foam super market tray packs!!!
   I will use the remaining dwarf mine workings and the two mirrors  as well as a few Ziterdes terrain pieces as Moria scenery to decorate the box. Below you can see what I have done so far:

The box as it is at the moment

The box without the terrain pieces

The upper left corner

The upper right corner

The lower left corner

And the lower right corner.

   I found some photos of Moria on the internet and I used them as a background. Two of the photo scenes depict cliffs, bridges, etc and have light beams so I stuck them on the upper part of the box, while the other two depict some Dwarf statues, so I thought that they are proper for the deep lower part. Below you can see what goes where:  

The Wargs' corner

   Ok, I know that Wargs were not living in Moria, but I had to put them somewhere. So, I placed them close to the "entrance". 

Bats' place

Goblins' corner

Dweller's corner or "Karyatis" corner as my wife says

Trolls' and goblins' place. Guess, where the drum-trio goes!

Spiders' and swarm's corner.

   Next thing I have to do is to cover all the walls with wood putty and to pour some plaster on the tiny stones to make them look natural.
   I will tell you a "common secret" now. Next time you will go to super market to buy vegetables or fruit keep their trays. You can cut the edges and keep the even surface, which you can use later as a "stone wall". The only thing you have to do is to draw with a pen the stones on it and that's it! The walls of the Dweller's corner and the path to the Statue of Seer are of this material.    

white foam super market tray pack

   That's it for today. Stay tuned for more Moria! 


Monday, November 12, 2012

Moria Display Box WIP

   These days a Moria army is my current project. It consists of ninety miniatures in total, but unfortunately, only sixteen of them are ready so far. While the army project continues with such a slow pace, I found a wooden box to use as its shelter. A new display box, which will be placed next to my previous Dwarf Display Box.
   When I found it, the box needed treatment; I had to smooth its surface and put some putty to fill its holes. Then I coated it twice with varnish and after that I stuck two rows of led lamps. Now, I have to build the interior so that it looks like a cave. Below you can see what I have done so far: 

The Moria display box

 
This is what I found

A neighbour must have expensive taste

I put a couple of balsa woods as supports

The other side

The floor

The box ready for coating

The led lamps

   That's it for today! Stay tuned for more Moria!


Saturday, April 28, 2012

Dwarf Display Box

   Dwarf Display Box is ready finally! Below you can see the painting procedure step by step. All colours are Vallejo, otherwise I mention the brand:

The final result.

The black wood putty.

The ground painted black.

Highlighted first with neutral grey.

Next with green grey.

Flat earth.

Green grey + white.

GW fortress grey.

And white.

The RCA wire for the interior light.

I added grass and stones.

I wiped whatever was not glued.

The box under daylight.

Time to celebrate!!!

The box interior light.

   In case someone is interested here you can find the sketches (made by my wife, by the way):


   That's it for today. Stay tuned for more!

Related Posts Plugin for WordPress, Blogger...